The sample store is contained in a zip file that came with the rest of Content Server.
To operate the sample store you need a web server that can actually serve up the store (i.e. respond to HTTP requests and fetch the necessary resources from the PHP that comprises the store.)
Assuming you installed Apache as outlined at the beginning of the guide, all you need to do is extract the contents of the zip file to a folder here:
C:\Program Files\Apache Software Foundation\Apache2.2\htdocs
For simplicity, extract the contents into a new folder in htdocs called bookstore.
Then your new bookstore will be addressed like this:
http://yourdomain.com/bookstore
The store is installed. Now let's set it up.
Go back to the Admin Console and open the Distributor's panel.
Click on the Export Sample Site button. You will see a dialog (without the URL filled in).

You need to perform two operations:
- Export the Catalog XML file (books.xml). This is what it suggests, an XML file that contains all books that are assigned to the specified distributor.
- Store the Config XML file (config.xml). This is sets up the configuration file for the store.
You must save the file into the same folder where you unpacked the Store files (in htdocs/bookstore). Then select the radio-button next to Store Config.
Where it says “Enter link URL”, enter the exact link to the fulfillment service for Content Server.
The store will construct the necessary link for fulfillment for this info, so it must include the port (if any). Then press Next and it will again prompt you to save the config.xml file. Save it to the same folder (htdocs/bookstore). You will then be back at the same dialog. Just dismiss it now by choosing Close.
You typically only have to set up the config.xml file once, unless you change the URL to the fulfillment service.
But you need to update the catalog (books.xml) anytime you change any part of the catalog – books, permissions, etc.
Now, go back to your browser and enter the URL to the bookstore,
e.g. http://yourdomain.com/bookstore/index.htm
You should see a page that contains the books that were exported to that Distributor.
Click on purchase and you will be taken to another page with more choice to further restrict the permissions on the book. This is not part of a normal store, of course, but this is a sample test app.

Click on the purchase button again and it will take you to the “Thank you” page.
This is the page normally presented by a web site after the user has presented their money and/or accreditation.
Click on “Download” and the download to Adobe Digital Editions should start.
 And that's it. You now have a complete, end to end installation of Content Server.
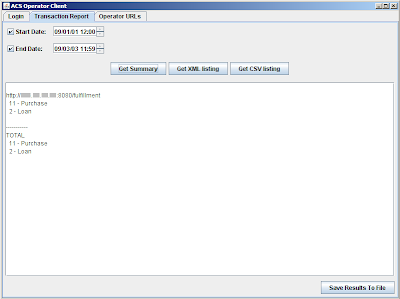
As a last note, you can check out transaction logs using the operatorClient tool, should you want to.
 Thank you for reading this tutorial and i hope it was of some help.
I'm interested in getting suport in a instalation of ACS4.
ReplyDeleteIf you have experience on instaling ACS4, Could I buy some support from you?
cint.consulting@gmail.com
(Barcelona - Spain)
Thanks, Sergi